

What are Pioneer EIFS?
EXTERIOR INSULATION AND FINISH SYSTEM or EIFS is a Non-load bearing outdoor wall finish system, consisting of Thermal insulation Board, an attachment system, a reinforced basecoat & Compatible Finish.
Get Started with EIFS
EIFS are type of cladding for exterior building wall. The system uses a barrier type cladding. Unlike drainage type of wall that route leaks back to the outside. It relys entirely on the outside surface to keep water out. EIFS have no internal drainage provision. Barrier type claddings require good design & workmanship since the barrier concept does not account for water leakage.
Advantages of Using EIFS
- EIFS don’t require joints in the outside surface.
- EIFS do need joint where the Substrate behind the EIFS changes & under a few other conditions.
- Due to seamless exterior surface, its result an extremely low air filtration rate. It means its help reduce heating & cooling cost.
- It gives constant room temperature.
- Flexible materials. They can be used on lightweight in expensive wall structure.
Disadvantages of Using EIFS
- Sensitive to the quality of application.
- Combustible materials
- Difficult replacement of sealant joints.
- EIFS are easier to damage.
3 Types of EIFS
![Thumbnail [100%x225]](images/Direct Applied.jpg)
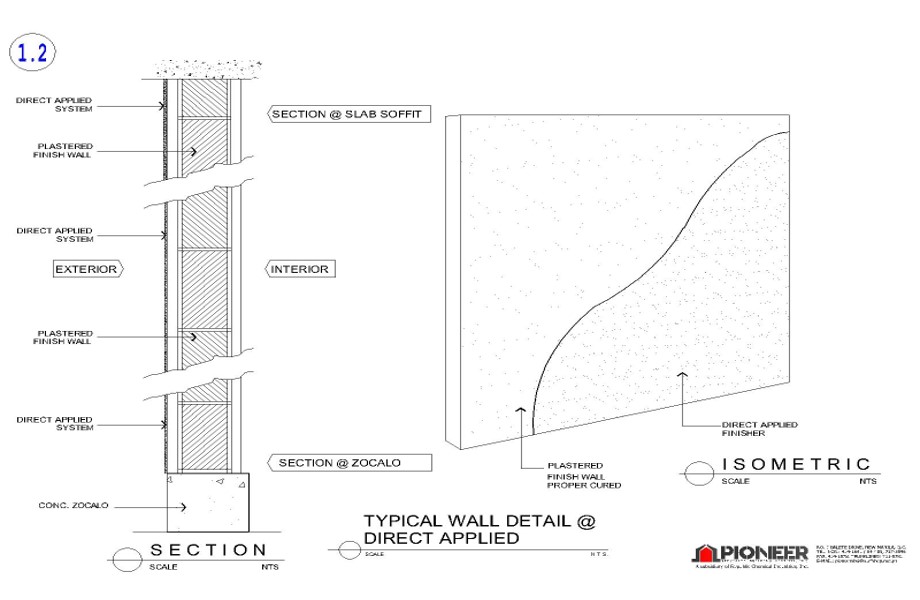
Direct Applied System
Our direct applied system can be applied directly on to existing plastered finish walls, components and cladding as a clean finisher.
![Thumbnail [100%x225]](images/Therm.jpg)
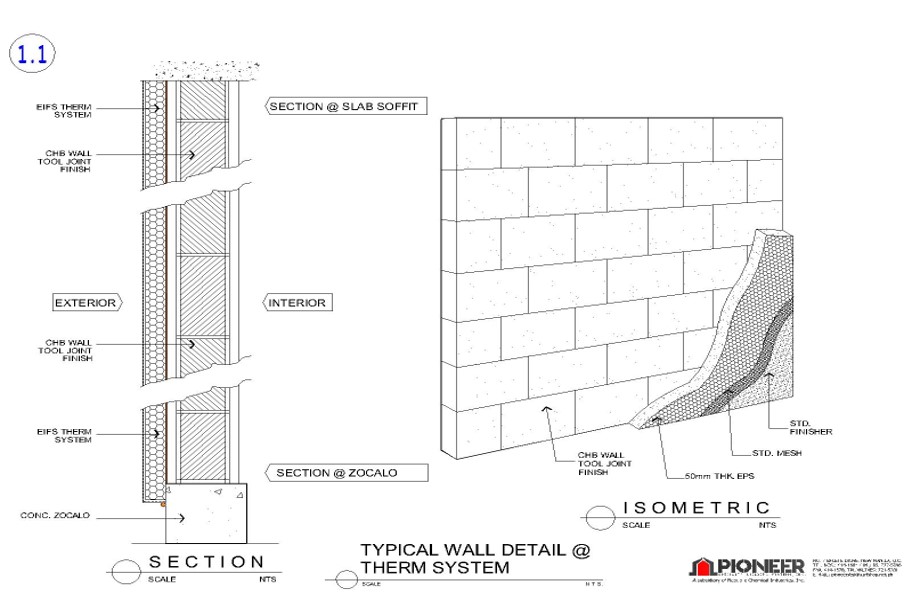
Therm System
Our therm system can be applied to any unfinished chb wall, component and cladding with added insulation protection.
![Thumbnail [100%x225]](images/Full Therm.jpg)
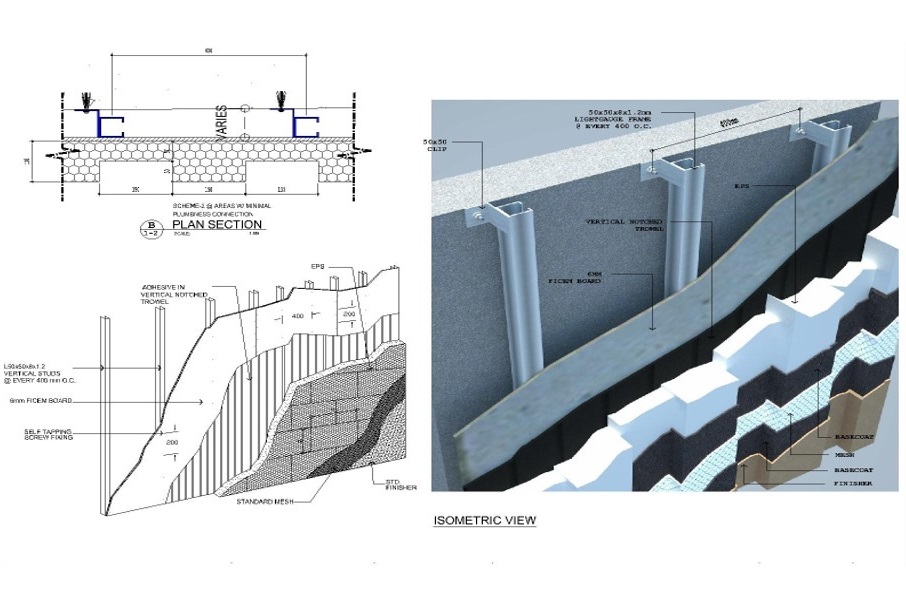
Full Therm System
Our full therm system uses a durable lightguage framing structure for the benefit of both insulation and flexibility in any design.
EIFS Application
Step1: Installing EPS
The 2” x 4” EPS is commonly use. There was 2 Methods of installing the EPS or Expanded Polystyrene.
1. Dab & Ribbon Method – works well on most Substrates
2. Notch Trowel Method – works best on flat surface.
Make sure to use enough adhesive & make sure that it contacts the Substrate.
Step2 : Sanding
Sanding of the EPS is done to meet the stiffness and to avoid any wavyness in the wall.
It usually done on the termination of EPS
Step 3: Applying of Basecoat
Usually applied by hand with a trowel. Be sure that the adhesive is sticky & stiff enough to hold on the vertical surface. The proper thickness of the basecoat is crucial. It must be thick enough to fully embed the reinforcing mesh about 1-1/2 times the overall thickness of the mesh.
Application of Reinforcing Mesh
Is place into the adhesive while adhesive is still wet the basecoat is then immediately trowelled to fully embed the mesh.
Application of Finisher
It is usually applied into two steps. Trowelling and then Spraying.
See more of Our Projects
Keep updated with our latest products & services for free by subscribing to our newsletter.